
In this post, I will guide you through the process of upgrading VCD from version 10.4.2 to version 10.5.1.
Although VCD 10.5.1 is considered as a patch release from version 10.5.0, however it came with a lot of new features and enhancements as per the below release notes.
Upgrade Prerequisites
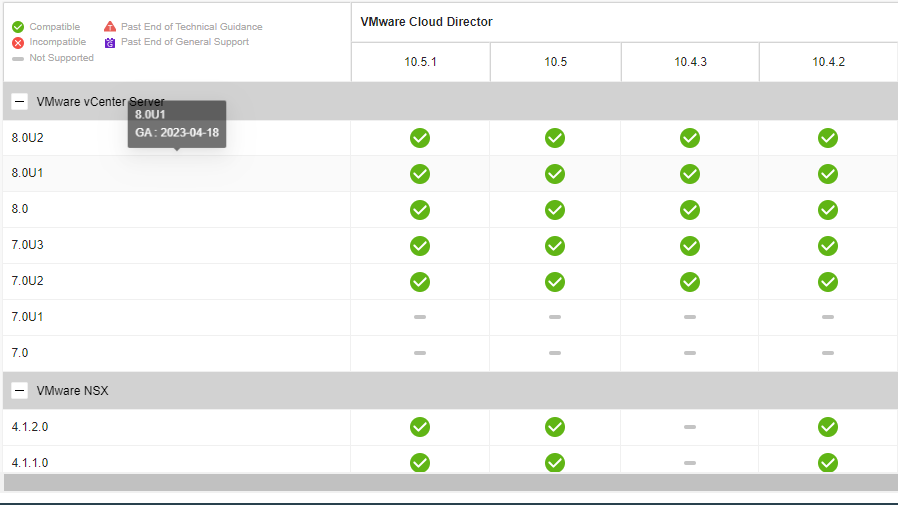
Step1: Check VMware’s interoperability matrix to make sure VCD 10.5.1 is compatible with the existing solutions such as vSphere, NSX, NSXALB… This depends on the solutions you have integrated with current VCD infrastructure.
https://interopmatrix.vmware.com/Interoperability?col=661,&row=912,%262,
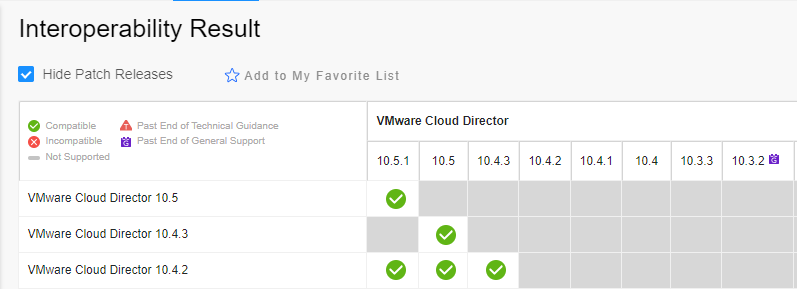
In addition, make sure that there is an upgrade path from VCD 10.4.2 to VCD 10.5.1.
https://interopmatrix.vmware.com/Upgrade?productId=661
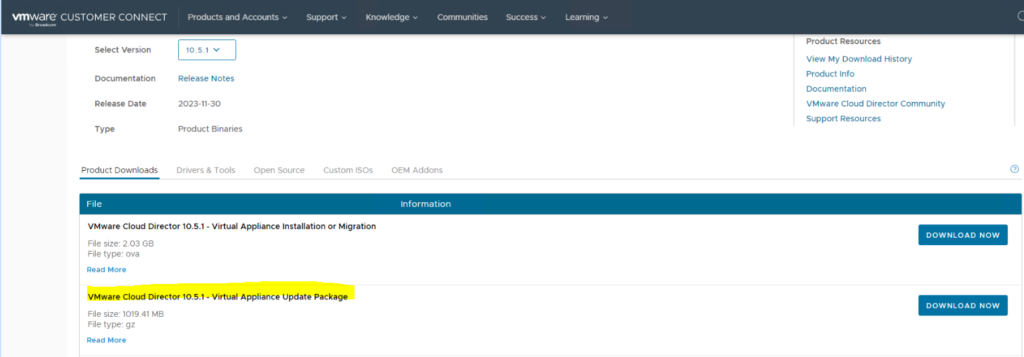
Step2: Download VCD 10.5.1 update package from VMware Downloads portal.
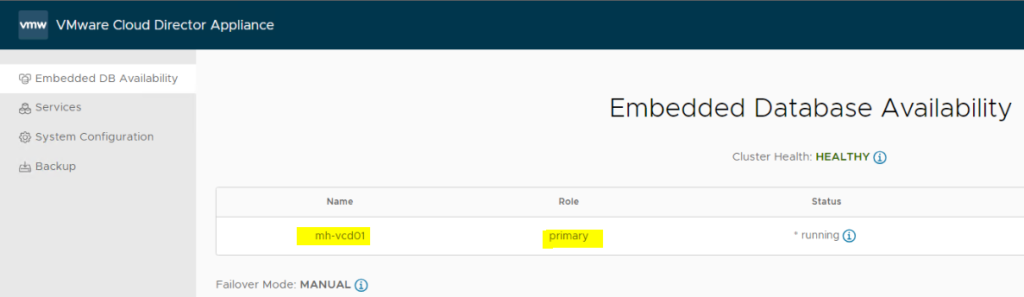
Step3: Login to https://<VCD FQDN or IP Address>:5480 VAMI portal and Check if the automatic failover in case of a primary database service failure is enabled, change the failover mode to Manual during the upgrade. After the upgrade, you can set the failover mode to Automatic.
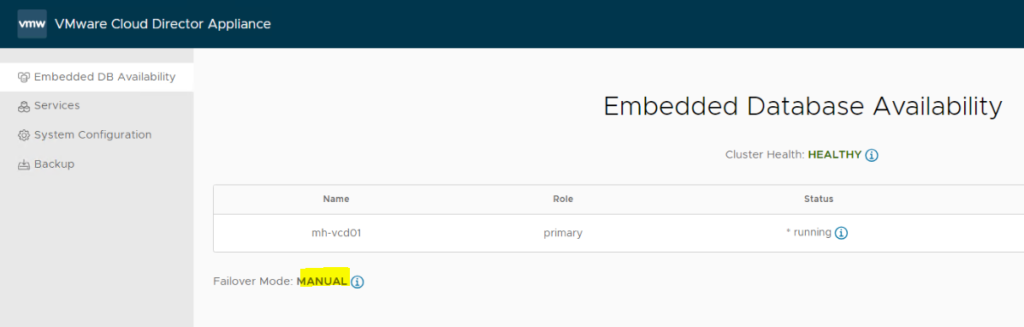
In addition, Verify that all nodes in your database high availability configuration are in a HEALTHY state.
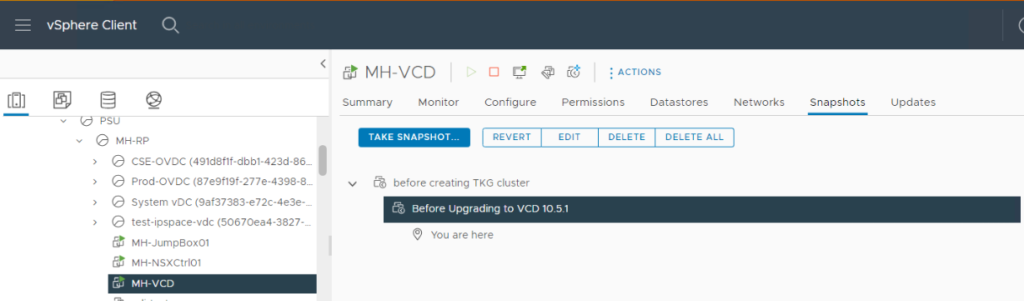
Step4: Log in to the vCenter Server instance on which resides the primary VMware Cloud Director appliance and take a snapshot.
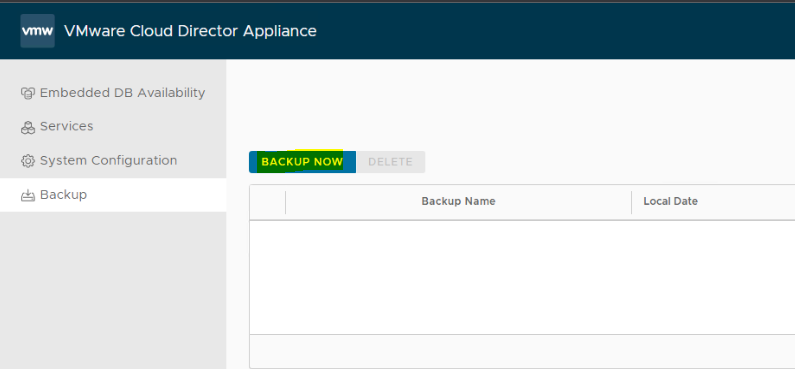
Additionally. login to VCD primary node’s VAMI portal and take a backup of the database.
Upgrade Procedure
Step1: Login to https://<VCD FQDN or IP Address>:5480 VAMI portal and identify the primary VCD node. You must upgrade the primary appliance before the standby and application cells.
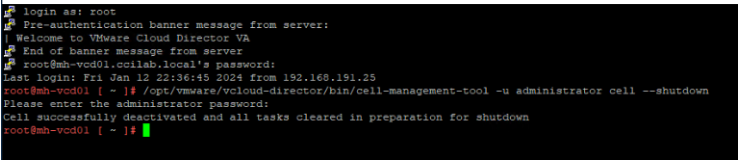
Step2: SSH to all appliances in the cluster and shut down VMware Cloud Director by running the following command:
/opt/vmware/vcloud-director/bin/cell-management-tool -u <admin_username> cell –shutdown
Step3: Upload the update package to the appliance you are upgrading. Remember You must upgrade the primary appliance first.
Step4: Create the local-update-package directory in which to extract the update package.
mkdir /tmp/local-update-package
Step5: Extract the update package in the newly created directory.
tar -zxf VMware_Cloud_Director_v.v.v.v–nnnnnnnn_update.tar.gz -C /tmp/local-update-package

Step6: Set the local-update-package directory as the update repository.
vamicli update –repo file:///tmp/local-update-package

Step7: Check for updates to verify that you established correctly the repository. The upgrade release appears as an Available Update.
vamicli update –check

Step8: Apply the available upgrade.
vamicli update –install latest

Step9: Repeat steps 3-8 on the remaining standby and application cells.
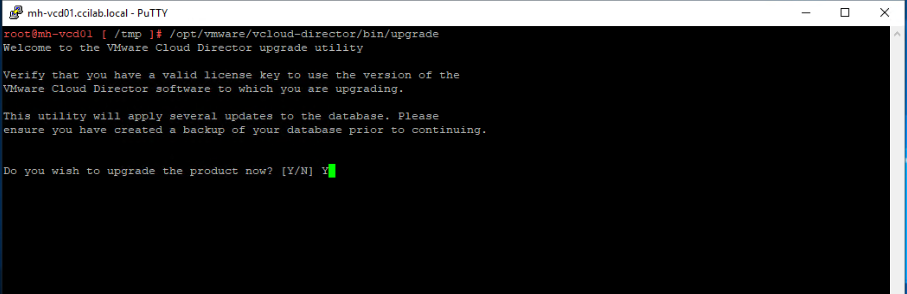
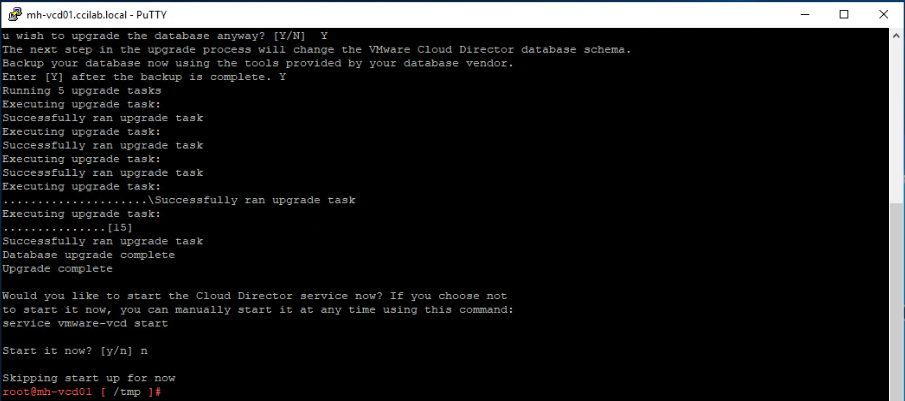
Step10: From any appliance, run the VMware Cloud Director database upgrade utility.
/opt/vmware/vcloud-director/bin/upgrade
Step11: Reboot each VMware Cloud Director appliance.
shutdown -r now
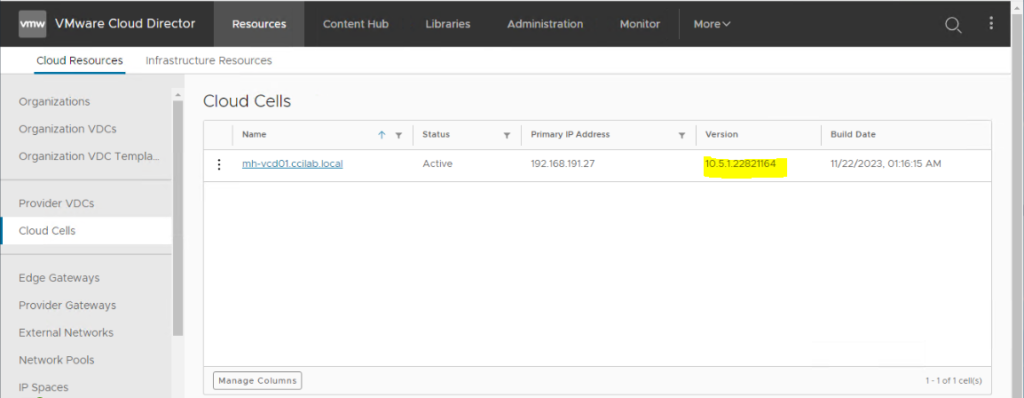
Finally, VCD has been upgraded successfully to version 10.5.1.
Leave a Reply