How to install a certificate on NSX-T to be used for Load balancing.
If your given a PKCS12 certificate which contains both the certificate and private key. First you will need to export the certificate without private key and then separately export the private key. To achieve this, i’d used OpenSSL:
Step 1: Export the Certificate using OpenSSL
Open CMD and navigate to the directory with OpenSSL exe file e.g. “C:\Program Files\OpenSSL-Win64\bin\openssl.exe”
Run the following command:
openssl pkcs12 -in file.pfx -out file.pem -nodesThis will give you a single file that contains everything you need. Private key, and the certificate. Open that file in notepad.
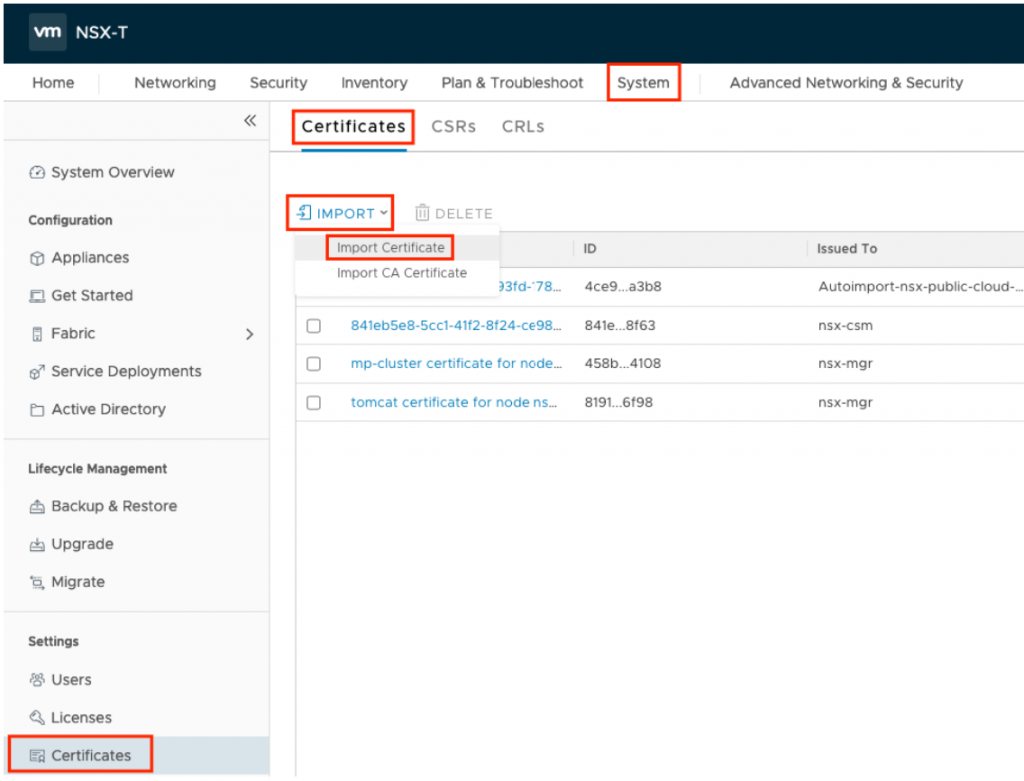
Open your NSX manager and Jump to System >Certificates>Certificates> IMPORT> Import Certificate to import your certificate.

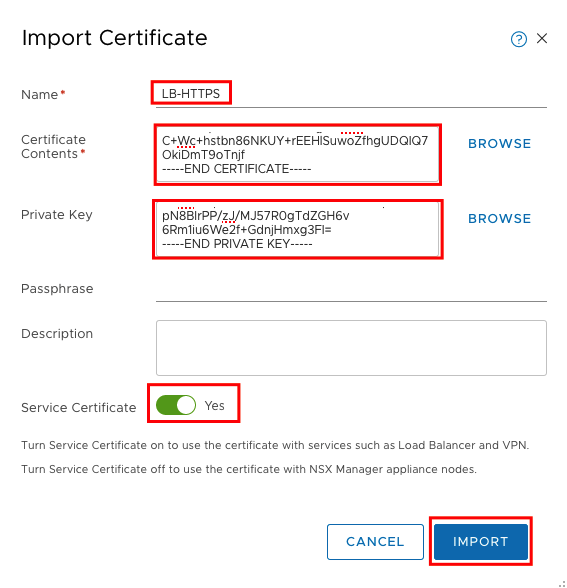
In the new window set a name for the certificate and paste the content from your single PEM file in the fields.
Make sure to copy the complete information including
For Certificate Contents: —–BEGIN CERTIFICATE—– / —–END CERTIFICATE—–
For Private Key: —–BEGIN PRIVATE KEY—– / —–END PRIVATE KEY—–
Important
****Service Certificate must be enabled and Passphrase must be empty****
Example:

If your certificate is imported, you should see a new certificate in NSX with Type Certificate
Now go back to the Load balancer Section and create the VIP
Jump to Networking>Load Balancing>VIRTUAL SERVERS>ADD VIRTUAL SERVER>L7 HTTP to create the new Virtual Server.
Create HTTPS VIP
I’d named the server https-server in this example and use the same virtual IP used also for http server. Port will be 443 for HTTPS. Choose the previous configured Load Balancer and Server Pool.

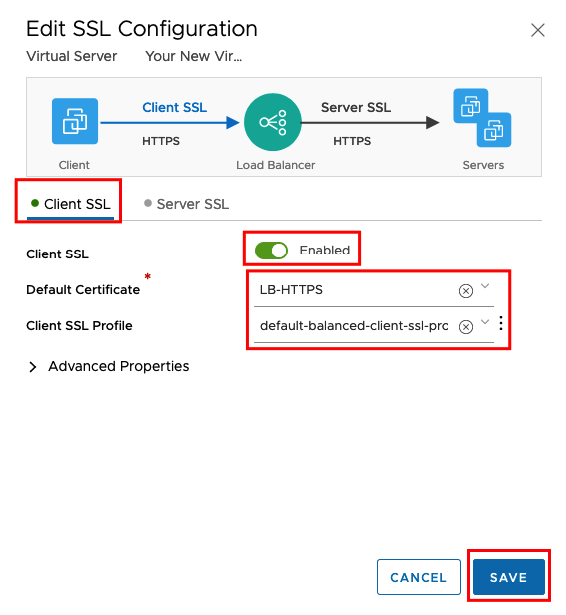
We will enable SSL only between Client and the Virtual Server. From the Virtual Server to the Web Server farm we will still using HTTP (Port 80) because we didn’t configure SSL on our Web Servers.

That’s everything, next test access to the site using HTTPs.
Leave a Reply